Module 3 • Lesson 3✨ Eyes, Teeth & Hair — Natural Finish
The Module 3 deliverable. The last five percent of a retouch — brighter eyes, cleaner teeth, tamed stray hairs — is what people actually notice. Done with restraint it lifts a portrait; overdone it screams "edited." This lesson is about knowing exactly where to stop.
📚 What You'll Learn
By the end of this lesson, you will be able to:
- Brighten and sharpen eyes with a masked local edit
- Whiten teeth by removing yellow first, then brightening — not the reverse
- Tame flyaway hair and fill gaps without a helmet-hair look
- Apply every finish through a mask so nothing bleeds where it shouldn't
- Judge the "natural line" — the point where more becomes worse
⏱️ Estimated Time: 55 minutes
🎯 Project (Module 3 deliverable): A finished portrait taken through the full pipeline — even skin, sculpted light, and natural eye/teeth/hair polish — that a stranger would call "a great photo," not "a great retouch."
In This Lesson
👤 The Goal: The Last Five Percent
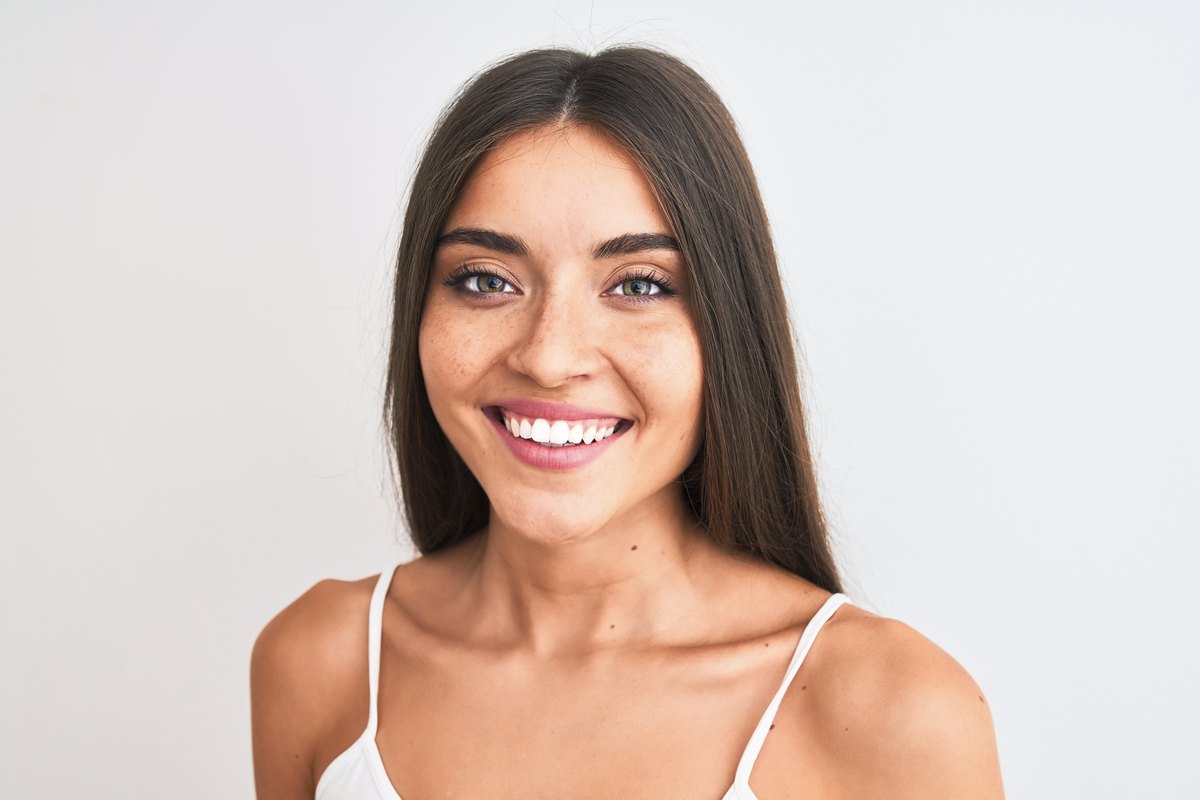
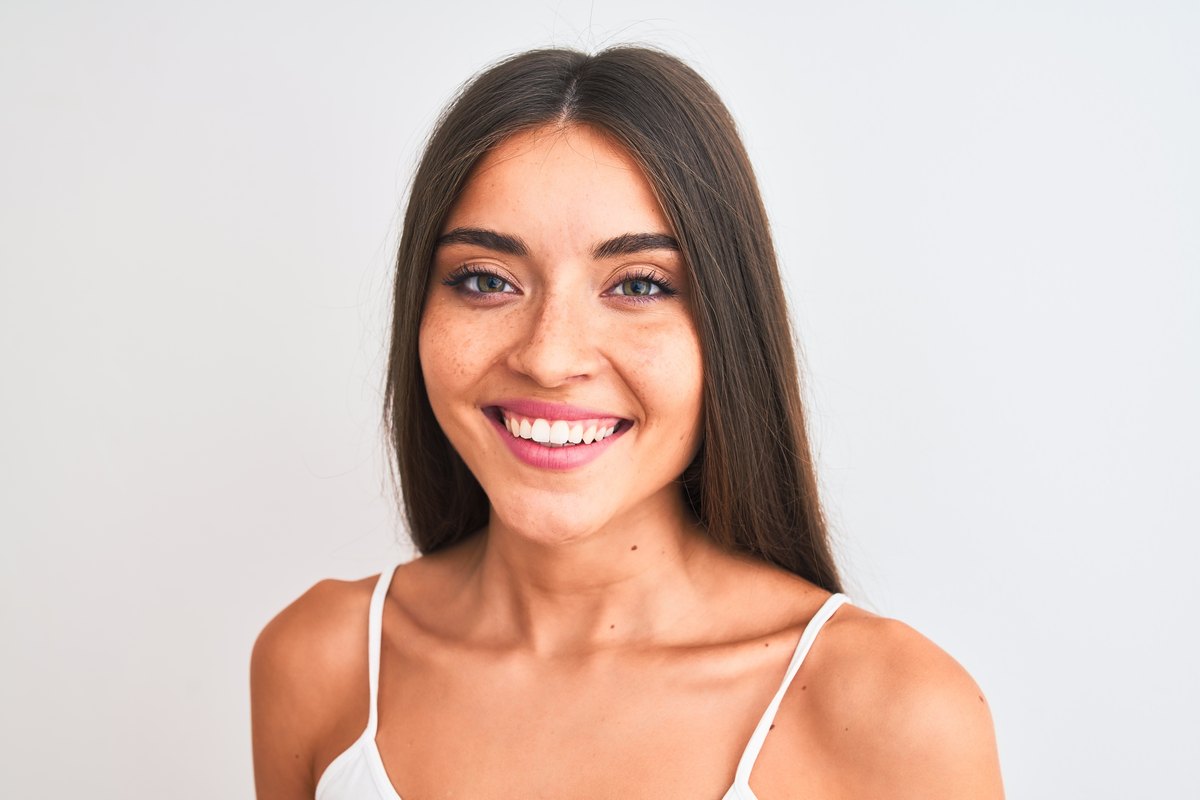
On the right, the portrait after skin and sculpting but before the finish. On the left, the same shot with the eyes brightened and the teeth cleaned of yellow. The skin is untouched here — this is only the local polish, and it is still enough to make the face read as more awake and alive. Drag the handle:
🧠 Mental Model: Local, Masked, Restrained
Every finishing move shares one shape: make an adjustment, then hide it behind a black mask and paint it back only where it belongs. The eyes get brighter only in the eyes; the teeth lose yellow only on the teeth. Nothing global, everything local.
The second rule is restraint. Eyes and teeth are the classic tells of an amateur edit because they are so tempting to push. The trick for teeth is counter-intuitive: remove the yellow first (desaturate) and only then brighten. Brightening a yellow tooth gives you a bright yellow tooth; pulling the yellow out and lifting gently gives you a clean, believable one.
🔧 The Three Finishes
Each finish is a masked adjustment layer or a dedicated retouch layer. Here is the recipe for all three:
⚠️ Eye whites and teeth are not toothpaste-white
Real eye whites are faintly gray or pink and real teeth are faintly warm. If you push either to pure white, the brain instantly flags it as fake. Aim for "clean," never "glowing." Back off until you doubt you did anything, then stop there.
🛠️ Guided Build: Finish the Portrait
Open your sculpted portrait from Lesson 3.2. This is the final stage of the Module 3 pipeline.
Step 1: Eyes · 12 min
- Add a Curves layer, lift the midtones a little. Invert the mask to black (Ctrl/⌘+I), then paint white with a small soft brush over the iris and the whites.
- Optionally sharpen the iris: make a merged copy of everything below (Ctrl+Alt+Shift+E / ⌘+Option+Shift+E), run Filter ▸ Other ▸ High Pass at a small radius (about 1–3 px), and set the layer to Overlay or Soft Light so the gray drops out. Alt/Option-click the Add Layer Mask button for a black mask and paint white over the iris only. Keep the catchlight sacred; never paint it out.
Step 2: Teeth · 10 min
- Add a Hue/Saturation layer. Choose Yellows, drop saturation; then on Master, raise lightness slightly. Yellow out first, brightness second.
- Invert the mask to black and paint the effect onto the teeth only. Feather the gum line so there is no hard edge.
Step 3: Hair · 10 min
- Add an empty layer, Clone/Heal set to Sample: All Layers. Remove distracting flyaways against the background with short strokes that follow the hair direction.
- Fill a thin gap by cloning nearby strands along their natural flow. Leave a few stray hairs — perfectly smooth hair looks like a wig.
Step 4: Final review · 8 min
- Zoom out to fit and mirror the view with View ▸ Flip Horizontal. A mirrored view exposes anything overdone, and because it only flips the view (not the pixels), you just choose it again to return. (Image ▸ Image Rotation ▸ Flip Canvas Horizontal also works, but it flips the actual pixels, so you must flip back before saving.)
- Toggle all your Module 3 work off and on. If the "before" looks untouched and the "after" just looks like a good day, you have nailed the natural line. Save As
portrait-finished.psdwith every layer intact, and deliver. 🏆
✅ Project Completion Checklist (Module 3 deliverable)
- ☐ Even skin from frequency separation (3.1)
- ☐ Form restored with dodge & burn (3.2)
- ☐ Eyes brightened and sharpened through a mask
- ☐ Teeth de-yellowed then gently lifted, masked
- ☐ Flyaways tamed, a few strays left, on their own layer
- ☐ Passes the flip-and-mirror test — reads natural, not retouched
🧗 Now You: Solo Variation
🌟 Your challenge
- Finish three portraits back to back and time yourself. A professional headshot finish should take minutes, not hours — speed comes from a fixed routine.
- Make a deliberately over-finished version (glowing eyes, blue-white teeth, plastic hair) next to your restrained one. Keep both as a reminder of the natural line.
- Finish a portrait meant for a magazine (push a little) and the same one for a LinkedIn headshot (push almost nothing). Context sets the amount.
Going further: save your three finishing layers as a template group you can drag into any portrait, then just repaint the masks. Your future self will thank you on every portrait after this one.
🍳 Recipe Card: Natural Finish
Eyes, teeth, hair — masked and gentle
- Eyes: Curves lift + optional High-Pass sharpen, black mask, paint iris & whites
- Teeth: Hue/Sat — drop Yellows, raise lightness slightly, black mask, paint teeth
- Hair: empty layer, Clone/Heal (All Layers), remove flyaways, fill gaps
- Keep whites off-white and teeth faintly warm
- View ▸ Flip Horizontal to audit, toggle before/after, deliver
Mantra: the best finish is the one no one can point to.
📓 Learning Journal
Add to your journal after this lesson:
- Key concepts you learned
- Techniques that clicked for you
- Questions or confusion points to revisit
- Ideas you want to try
- Your progress and feelings about learning this
✍️ This lesson's prompt: Where is your natural line? Describe a finish you have seen (an ad, a friend's photo) that crossed it, and name exactly which move gave it away.
📝 Module 3 Summary
🎓 Key Takeaways
- Frequency separation splits tone from texture so you fix each without harming the other.
- Dodge & burn on a 50% gray Soft Light layer rebuilds three-dimensional form, built low and slow.
- Finishing is local, masked, and restrained: brighten eyes, de-yellow then lift teeth, tame hair.
- The mark of a pro retouch is that you cannot see the retouch — the natural line governs everything.
🎉 What You've Accomplished — Across All of Module 3
You now command the full high-end portrait pipeline: even, textured skin (3.1); sculpted light and dimension (3.2); and the natural finishing touches that sell it (3.3). Just as importantly, you learned restraint — the judgment to stop before an edit betrays itself. That taste, more than any single technique, is what clients pay retouchers for.
❓ Common Questions at This Stage
What order do these three lessons go in on a real job?
Always: global corrections → frequency separation (clean) → dodge & burn (sculpt) → eyes/teeth/hair (finish). Cleaning after sculpting undoes your light; finishing before cleaning wastes effort. The pipeline order is the workflow.
How much retouching is "too much" ethically?
Technique is neutral; context sets the line. Evening skin and brightening eyes for a headshot is normal; reshaping a body for an ad aimed at teenagers is a different conversation. Keep the person recognizably themselves, and be honest with clients about what was changed.
🔭 Looking Ahead
You can now perfect a single subject. Next you learn to combine them convincingly. Module 4 — Commercial Compositing covers matching perspective, light, shadow, and atmosphere so that two photos shot on different days look like one impossible scene.
✅ Before the Next Module
- Take one portrait through the complete 3.1 → 3.2 → 3.3 pipeline and keep the layered file.
- Save your finishing layers as a reusable group.
- Write your Learning Journal entry.
📚 Additional Resources
🌟 Encouragement for the Journey
You have finished the entire Core Craft tier — selection, color, and retouching, the three pillars every professional Photoshop workflow stands on. From here the work gets more ambitious and more fun: combining images, building design systems, and automating it all. The hardest fundamentals are behind you. Onward to compositing.