Module 1 • Lesson 3✂️ Select & Mask Mastery: The Hard Cutout
The Module 1 deliverable, and the true test of everything so far. Flowing, curly hair is the hardest common cutout there is. The secret is that a pro cutout is never one tool — it is a short, layered pipeline: let AI rough it in, refine the wisps, rescue the gaps with a channel mask, and clean the fringe.
📚 What You'll Learn
By the end of this lesson, you will be able to:
- Run the full Select & Mask workflow, tuned for hair
- Rebuild wispy strands with the Refine Edge Brush
- Rescue what refinement misses with a channel mask (Lesson 1.2)
- Kill the fringe with Decontaminate Colors and pressure-test the edge
⏱️ Estimated Time: 60 minutes
🎯 Project (Module 1 deliverable): Extract a hard subject — flowing hair — onto a new background with an edge that survives any scene.
In This Lesson
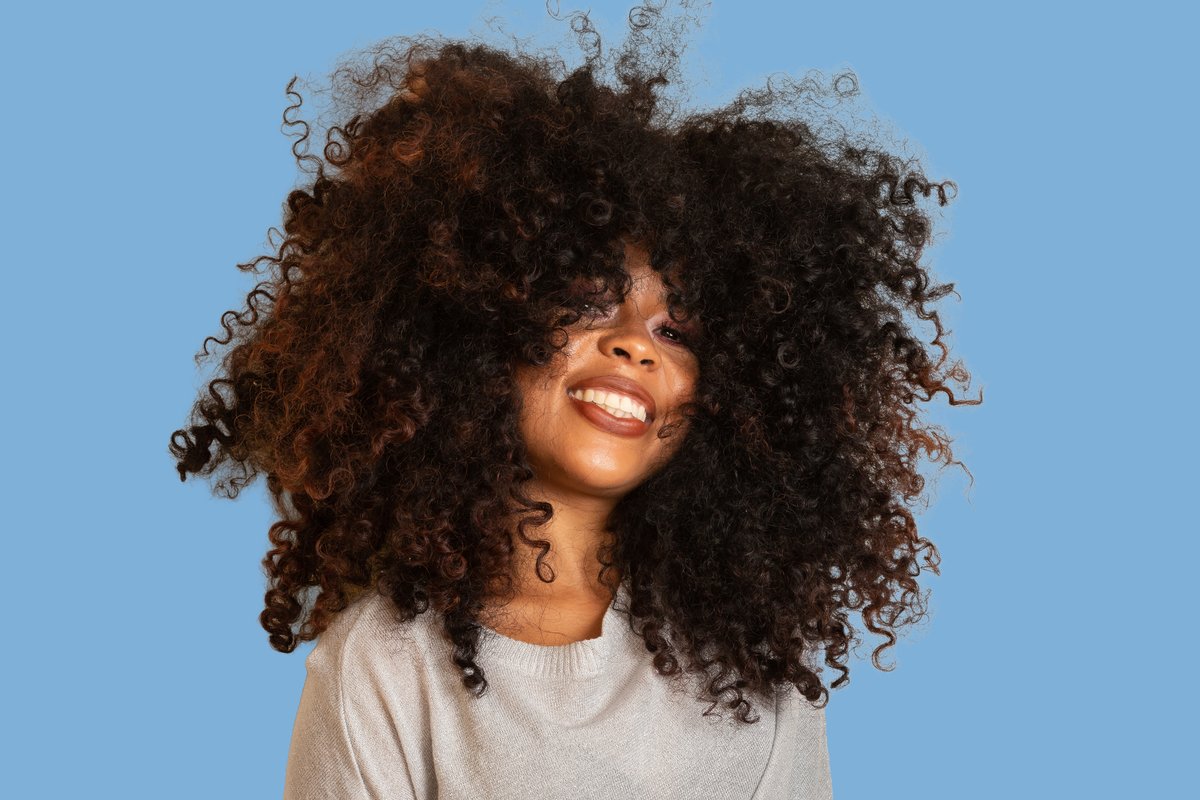
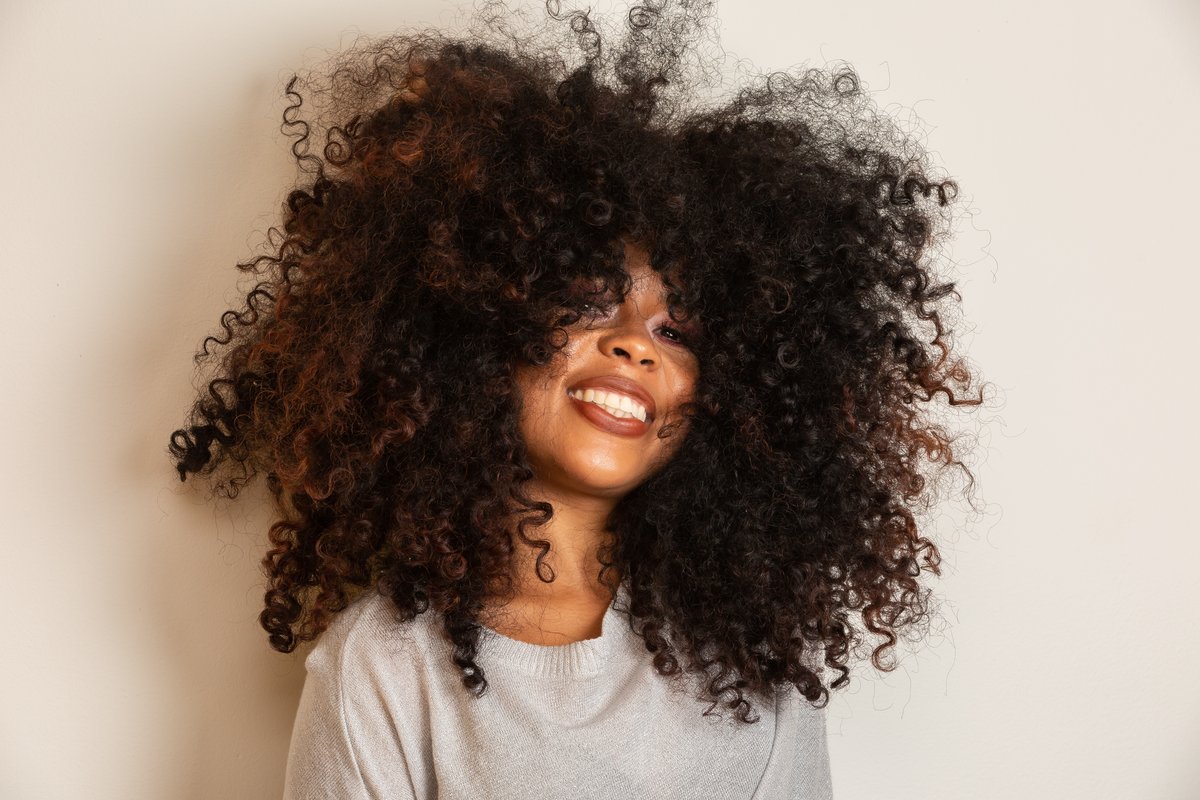
💇 The Goal: Every Strand Survives
Curly hair against one background, then lifted cleanly onto another, individual flyaway curls intact. On the right, the original studio shot; on the left, the same subject cut out and placed on a new backdrop. Drag the handle and inspect the edge:
🧠 Mental Model: A Pipeline, Not a Tool
Beginners look for the one button that cuts out hair. There isn't one. A professional hard cutout is a short pipeline, where each step cleans up what the previous one could not:
- Rough in the whole subject with Select Subject or Quick Selection — get the solid mass right, ignore the wisps.
- Refine the hairline with the Refine Edge Brush, which rebuilds fine strands.
- Rescue anything still missing with a channel mask (Lesson 1.2) painted into the layer mask.
- Decontaminate the edge so the old background's color lets go.
No single step is hard. The skill is knowing the order and not expecting step one to do step three's job.
🧠 Everything so far, converging
This lesson uses luminosity/edge thinking (1.1), channel masks (1.2), and the decontamination you met in the intro's compositing module. A hard cutout is where the whole masking toolkit earns its keep at once.
🎛️ The Select & Mask Workspace
Most of this happens in Select & Mask. For hair, three controls matter most, shown here as a diagram:
🛠️ Guided Build: The Hard Cutout
Open a portrait with loose or curly hair against a reasonably plain background. Save as cutout-working.psd, 16-bit. Duplicate the layer so the original stays intact beneath.
Step 1: Rough in the mass · 6 min
- Select ▸ Subject. It nails the body and solid hair, and gives up on the wisps. That is expected.
- Tidy obvious misses with Quick Selection (paint to add, Alt/⌥ to subtract). Do not chase strands yet.
Step 2: Refine the hairline · 10 min
- Choose Select ▸ Select and Mask (Ctrl/⌘ + Alt/⌥ + R, or the options-bar button while a selection tool is active). Set View to On Layers or the red Overlay.
- Under Edge Detection, tick Smart Radius and raise Radius a few pixels so Photoshop searches a wider band for strands. Try the Refine Hair button in the options bar for a quick first pass.
- Take the Refine Edge Brush and paint along the wispy hairline (not the solid interior). Photoshop rebuilds the fine strands and their partial transparency.
- Keep Smooth and Feather low; nudge Shift Edge slightly negative.
⚠️ Refine the edge, not the middle
Dragging the Refine Edge Brush across solid hair turns it translucent and mushy. Stay on the boundary between hair and background; that is the only place it belongs.
Step 3: Rescue gaps with a channel mask · 8 min
- Output the current result to a New Layer with Layer Mask (leave Decontaminate off for now; it comes last). Inspect: some flyaways may still be missing.
- From Lesson 1.2, build a quick channel mask of the hair: pick the channel with the most hair-vs-background contrast, duplicate it, and push it with Image ▸ Adjustments ▸ Levels.
- Ctrl/⌘-click that channel to load it, and invert if needed so the hair is selected. Click the layer mask thumbnail, then paint white with a soft, low-opacity brush along the hairline. The selection limits the paint to the strands, bringing lost detail back.
Step 4: Decontaminate & pressure-test · 8 min
- With the rescued layer mask selected, reopen Select and Mask, tick Decontaminate Colors, and raise Amount until the old background's color leaves the edge. Decontamination rewrites edge pixels, so it can only output to a new layer or document: choose New Layer with Layer Mask, which creates a fresh, decontaminated layer and hides the previous one.
- The test: drop a temporary saturated color layer behind the cutout. Any surviving fringe screams against it. Fix, then place your real new background. Module 1 deliverable: done. 🏆
✅ The standard
A believable hair cutout keeps the fine strands, shows no colored halo against a garish test background, and has a soft (not razor) edge. Hit those three and your composites will hold up anywhere.
✅ Project Completion Checklist
- ☐ Solid mass selected, then the hairline refined with the Refine Edge Brush
- ☐ Missing strands rescued via a channel mask painted into the layer mask
- ☐ Edge decontaminated; no fringe against a saturated test background
- ☐ Output as a layer + mask; original kept as a hidden backup
- ☐ Subject placed convincingly on a new background
🧗 Now You: Solo Variation
🌟 Your challenge
- Cut out a subject shot against a busy background (not a plain studio wall). This is where the channel-mask rescue step earns its place.
- Cut out something non-human and tricky: a glass, a potted fern, a pet. Each stresses a different part of the pipeline.
- Place one cutout on a dark background and one on a light background. Decontamination that looks fine on light often reveals a halo on dark.
Going further: Select and Mask has no Smart Object output, but you can still keep refinement open-ended: output to a Layer Mask, and later select that mask and reopen Select and Mask on it to adjust the edge without starting over.
🍳 Recipe Card: Hard Cutout
Extract flowing hair
- Select ▸ Subject for the solid mass
- Select ▸ Select and Mask → Smart Radius on, Refine Edge Brush along the hairline; low Smooth/Feather, Shift Edge slightly negative; output New Layer with Layer Mask
- Rescue missed strands: load a channel mask as a selection, paint white into the layer mask
- Final pass: reopen Select and Mask on the rescued mask, tick Decontaminate Colors, output to New Layer with Layer Mask
- Test against a saturated background; fix any fringe
Mantra: rough in, refine, rescue, decontaminate — in that order.
📓 Learning Journal
Add to your journal after this lesson:
- Key concepts you learned
- Techniques that clicked for you
- Questions or confusion points to revisit
- Ideas you want to try
- Your progress and feelings about learning this
✍️ This lesson's prompt: Which pipeline step did the heavy lifting on your image, and which did you almost skip but shouldn't have? Noticing that tells you where your cutouts usually go wrong.
📝 Module 1 Summary
🎓 Key Takeaways
- A hard cutout is a pipeline: rough in, refine, rescue, decontaminate.
- The Refine Edge Brush rebuilds wisps; a channel mask rescues what it misses.
- Decontaminate Colors strips the old fringe so the edge adopts any scene.
- Always pressure-test the edge on a saturated background.
🎉 What You've Accomplished — Across All of Module 1
You have rebuilt your selection and masking skills at a professional level: luminosity masks that let the image paint its own stencil (1.1), channel masks and Blend-If for subjects tone or color makes distinct (1.2), and a full hard-cutout pipeline for flowing hair (1.3). Between them, almost nothing is truly unmaskable anymore. Everything downstream — color, retouching, compositing — depends on exactly this control.
❓ Common Questions at This Stage
Select Subject already did the hair. Do I still need all this?
Its automatic hair is good and getting better, and for easy cases it is enough. This pipeline is for the hard cases it fumbles — dark hair on a dark background, fine flyaways, busy backgrounds — and for when you need to refine the result by hand rather than accept the automatic guess.
My cutout looks fine on white but has a halo on dark backgrounds.
Classic under-decontamination. Raise the Decontaminate Colors amount, and consider a tiny inward Shift Edge. Always test on the darkest background the cutout will actually sit on.
🔭 Looking Ahead
With selection mastered, we turn to Module 2 — Color & Tone, Deep: real color management and working spaces, grading with Curves, gradient maps, and LUTs, matching color across images, and soft proofing so your work survives the trip to print.
✅ Before the Next Module
- Do three hard cutouts of increasing difficulty (studio hair, busy-background hair, a glass).
- Save a reusable Action for your Select & Mask output settings.
- Write your Learning Journal entry.
📚 Additional Resources
🌟 Encouragement for the Journey
Cutting out hair used to be a rite of passage that took hours. You just did it with a repeatable four-step pipeline. That is a genuine professional skill, and the confidence it gives you carries into every composite you will ever build.